
You're backstage...now what??
At some point after you entered the Green Room, you either performed or completed the actions necessary to set up your presentation. Now that you have arrived backstage, you have one final task to perform — you need to share your computer screen so your presentation slides can be taken onto the Main Stage.
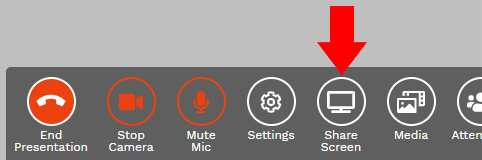
To start the process of sharing your screen, click/tap the Share Screen button in the Studio Control Panel. The button is shown in the illustration below.
A new dialog window, looking like the one shown in the illustration below, will pop up.

Your first action in the dialog is to choose Application window for the part of your screen you want to share (see the red arrow at the top of the dialog). Click tap the words "Application window" to make your choice, and the words will turn blue. When the dialog has changed to show your currently-running applications, the dialog may show more or fewer application thumbnails than are shown in the illustration (we have "grayed-out" most of the thumbnails in the illustration); however, one of the thumbnails in your dialog should represent PowerPoint running on your computer and loaded with the slides for your presentation. Click/tap that thumbnail, then click/tap the Share button.
So what happened?
Take a look at the illustration below, which shows the Studio after a presenter has shared his/her screen.

As you can see in the illustration, some changes occurred after the screen was shared. Please refer to the numbered tokens that have been placed on the illustration when reading the information below.
1 Share Screen button
The Share Screen button in the Control Panel has turned red, and the label has changed to "Stop Sharing". You can click/tap this button to stop sharing your screen, but do not do so until you are sure you have finished with your presentation. Remember...you may be asked to participate in a question-and-answer session after your presentation, and you may want to return to a slide in the presentation when you are answering a question.
2 Shared screen is backstage
The window (or screen) in which PowerPoint is displaying your slides has appeared as a thumbnail backstage. If you are working with only one screen on your computer — and you followed the steps listed in the PowerPoint setup actions sequence diagram — the thumbnail shows PowerPoint in Reading View. If you are working with at least two screens on your computer, the thumbnail is showing PowerPoint in full screen view.
Now both you and your presentation are backstage and are ready to be brought onto the Main Stage for actual delivery of the presentation.
3 "Stop sharing" floating dialog
The Studio provides another way to stop sharing your screen — a small "mini-dialog" that contains a button labeled "Stop sharing". You can use your mouse to drag this floating dialog to any location you like within the Studio, or you can hide the dialog with a click/tap on the word "Hide".
Quick Tip
PLEASE REMEMBER that while you are backstage, every sound picked up by your microphone will be heard by the entire audience! Do not talk while you are backstage, even if a member of the Studio staff is talking to you. Be aware of other sounds — such as dogs barking, telephones ringing, and toilets flushing — and develop a plan for eliminating them. As a last resort, remember that you can mute your microphone by using the Mute Mic button on the Control Panel.
Next, let's get you onto the Main Stage!
Click/tap the Next button to go to the next page; use the Back button to go back.